


iTunes 12 was released alongside Yosemite this year, but it didn't pack quite the punch that the operating system did. Instead, iTunes received a minor facelift, with few new features and somehow lacking the intuitive feel of its predecessor. If you're not thrilled with iTunes 12, we've got a few tips to help you feel like you've got iTunes 11 back on your computer!
Tip #1: Choose Song View for Lists
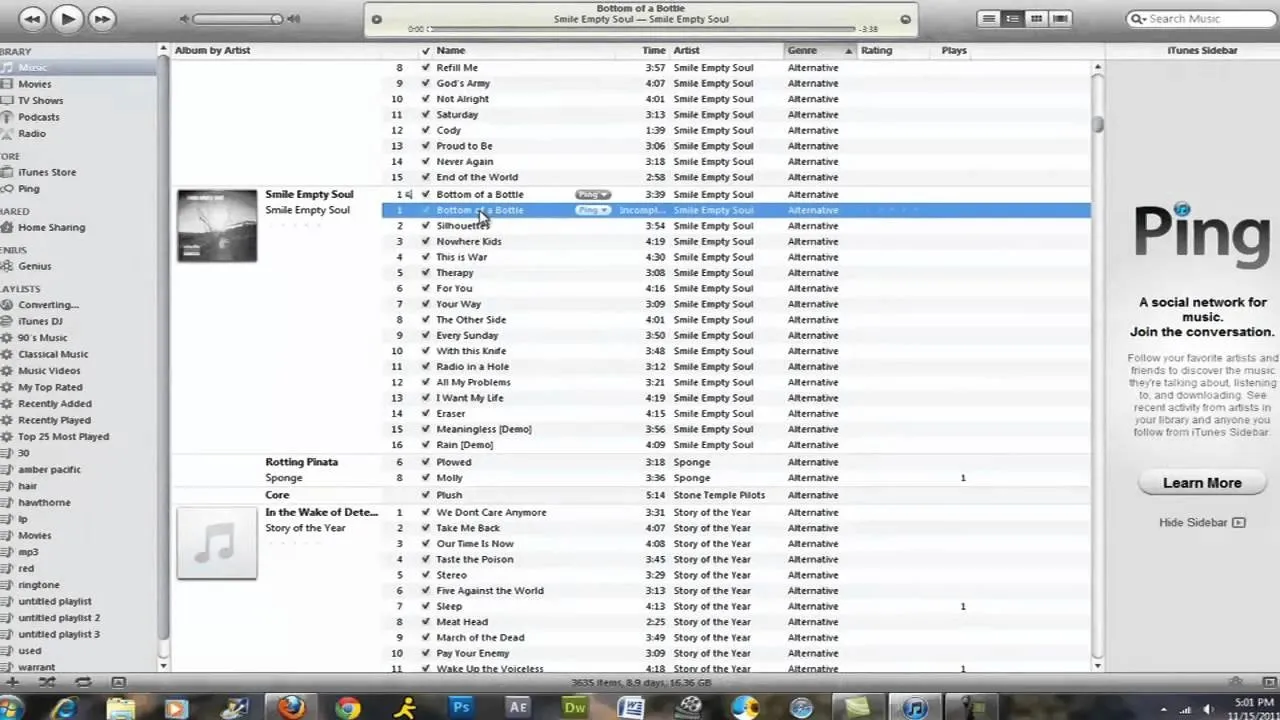
iTunes 12 initially chooses "Album" view so that all of your beautiful album art covers comes up, only I'm not much for browsing my music this way. I prefer scrolling through a list of songs, as many of them don't have album covers, so they're hard to view in "Album" view.
Click on the top right corner of iTunes to change the view; "Songs" will be one of the choices. Now you'll be able to view your music in a list.
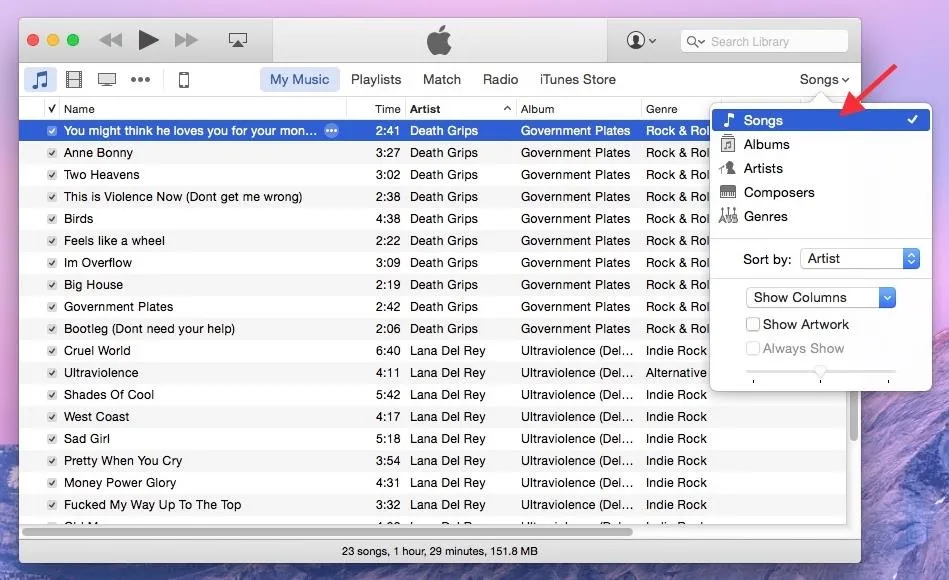
To further enhance this, you can enable the "Column Browser" by going to View -> Column Browser -> Show Column Browser. This will make it possible to browse your song list by artist, album, genre, etc.
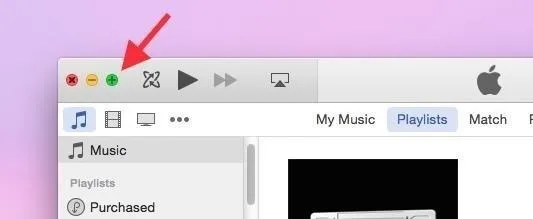
Tip #2: Use Playlists View to Bring Back the Sidebar
You've probably noticed that the sidebar is gone. Even further, Apple has gotten rid of the option to enable/disable the sidebar from the "View" menu in the menu bar.
Well, there is a way to bring back the sidebar, only it's a little hidden. Instead of viewing your music through the "My Music" option at the top of iTunes, click on "Playlists." This will bring up the full sidebar, which you can use to switch from your Apple devices and iTunes playlists.
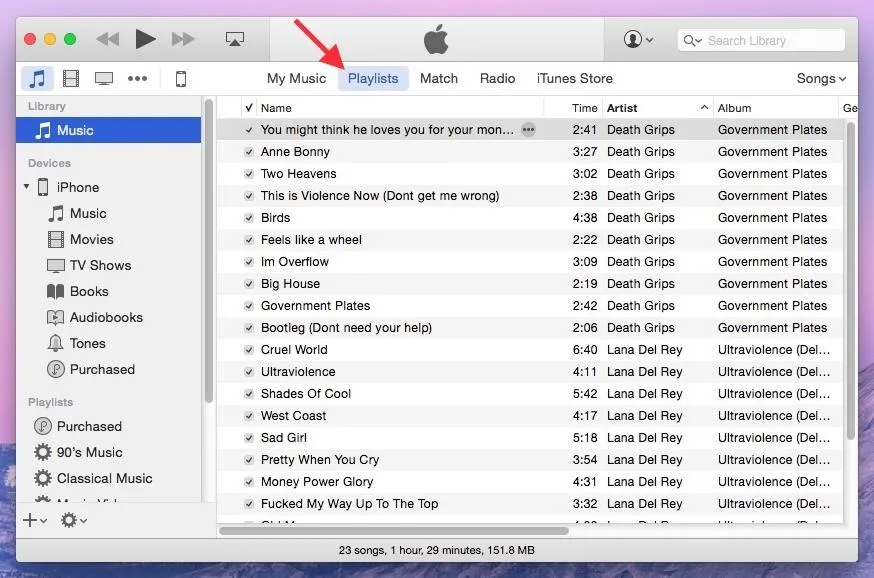
Unfortunately, you'll have to enter "Playlist" view for music, movies, TV shows, etc. to see the sidebar for each type of media, though it should remember your choices for each.
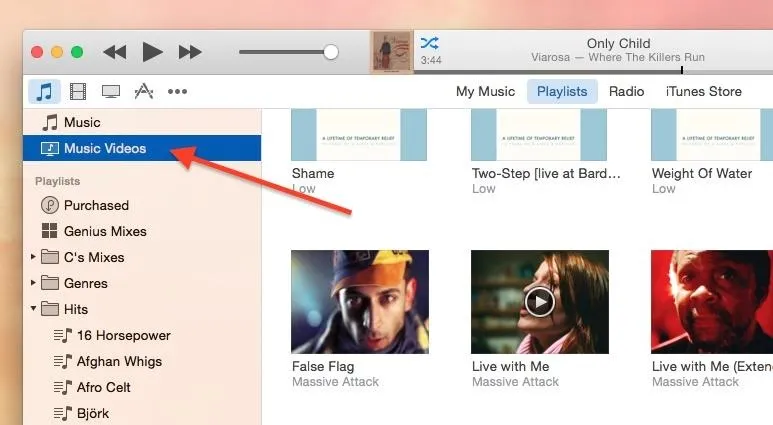
Tip #3: Find Your Music Videos Again
Oddly enough, iTunes 12 actually makes it pretty difficult to find your music videos, but piggy-backing off of the previous tip, you can bring them up in the "Music" tab with "Playlist" view enabled.
Tip #4: Get the Old-Style "Get Info" Window Back
Editing the metadata for songs, albums, and artists is crucial to keeping an organized library. On iTunes 12, this "Get Info" page has been updated with a new look that actually makes it harder to visually separate the information. Gone are the distinct borders for each entry, replaced with a bunch of text that almost seems to merge together.
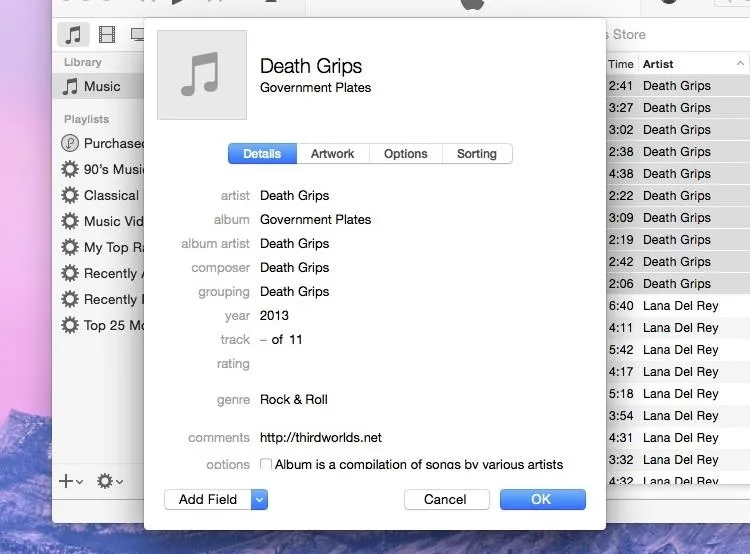
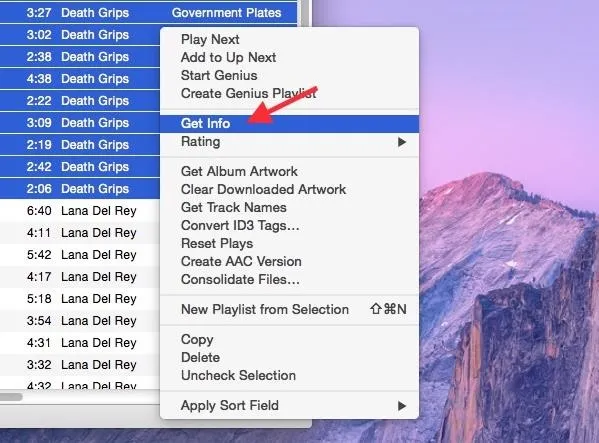
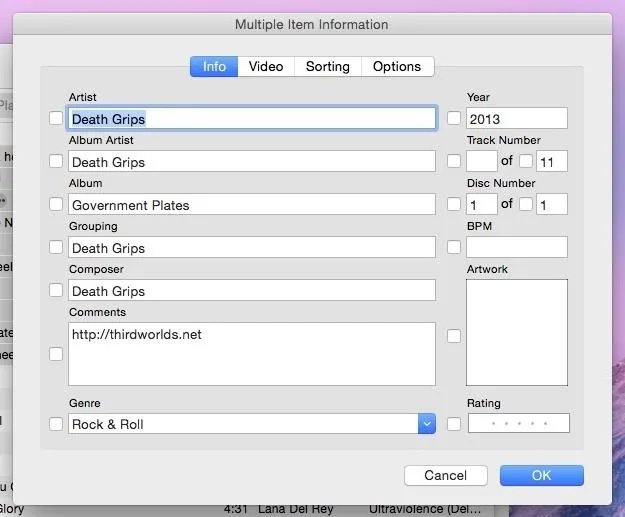
Luckily, there's a way to bring back the original. All you have to do is hold down on the "Option" key on your keyboard as you click on "Get Info."
You now have the older version of the Get Info window.
Tip #5: Use the MiniPlayer & iTunes Window Simultaneously
On iTunes 11, if you wanted to access the MiniPlayer (with the iTunes window still open) you could click on the album art thumbnail at the top of iTunes. With iTunes 12, if you tap on that same thumbnail you get the MiniPlayer, except that it closes the main iTunes window as well.
To open the MiniPlayer without closing iTunes, just hold down the "Option" key while clicking the thumbnail and both the MiniPlayer and iTunes window should coexist on your screen.
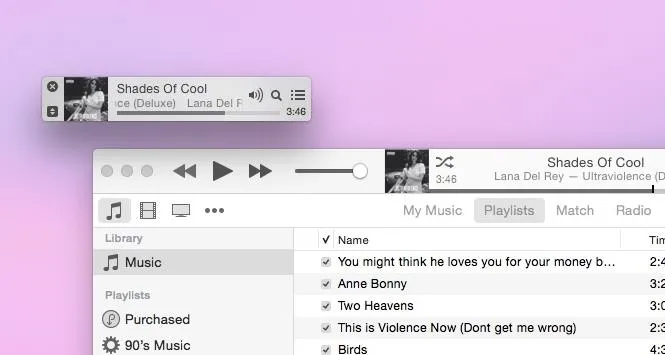
Alternately, you can just go to "Window" in the menu bar and click on "iTunes" to bring back the iTunes window while keeping the MiniPlayer.
Tip #6: Find the Maximize & Genius Shuffle Buttons
While this is more of a Yosemite change, the maximize button usually located in the top-left corner of iTunes is missing. Instead, it's now been combined with the full-screen button on the left-side. Simply hold down on the "Option" key and hover over the new green full-screen button and you'll see the old maximize button.
You'll also notice that the "Previous" button beside it turns into the "Genius shuffle" option when holding down on the "Option" key.
Tip #7: Change the Red iTunes Icon Back to Blue
In case you're not digging the new red color of the iTunes icon, you can easily revert back to the original blue iTunes 11 one. Just find the icon online (here's one in case you don't want to look), copy it, go into the iTunes app's "Get Info" setting, and paste the picture into the top left where the icon is.
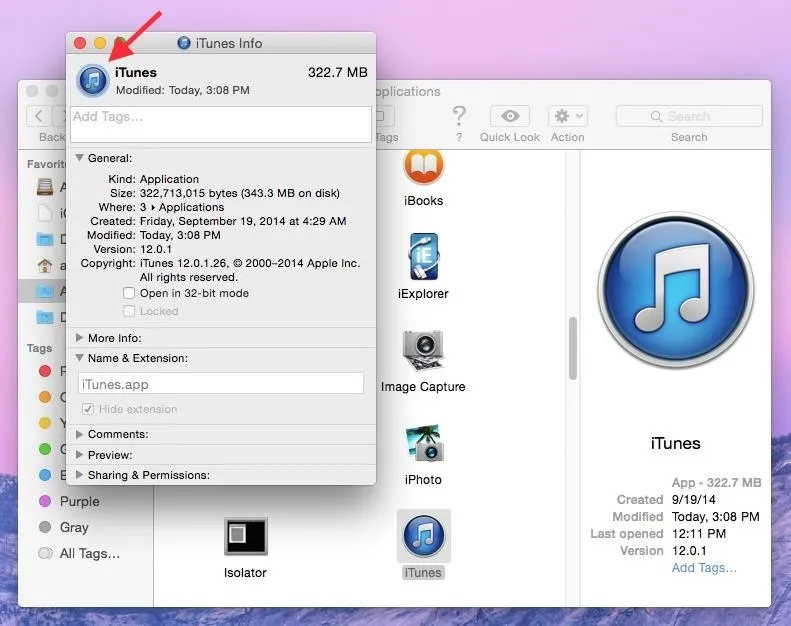
Peep the difference below.

For more thorough directions, follow our guide on how to change Mac app icons.
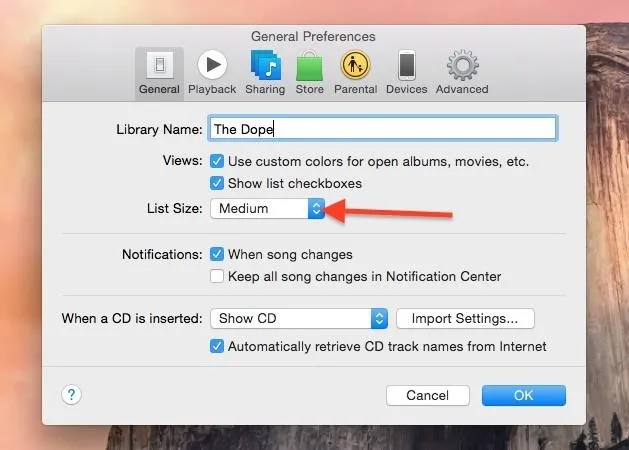
Tip #8: Adjust the Font Size for Lists
The font size in iTunes 12 may likely slightly different to you, but there's a new setting that let's you make it (and the space around text) smaller or large in list views. Just go to "Preferences" in the menu bar, then choose a "List Size" in the "General" tab.
If you want to change the sidebar size, that can be done system-wide by going to your Mac's "System Preferences" and choosing the sidebar icon size in the "General" tab.
Tip #9: Just Revert Back to iTunes 11
I don't recommend reverting back to iTunes 11 because you won't be able to use certain iCloud features such as Family Sharing, your iOS 8 devices might not play well with it, and because it's a laborious task. However, if you really want to give it a try, Macworld has a really good guide, which involves using the AppZappar and Pacifist apps, as well as some file backing up and moving.

How do you guys like iTunes 12? Do you prefer it over iTunes 11? Dislike the new look and features? Let us know in the comments below, and make sure to follow us over on Facebook and Twitter.


Comments
Be the first, drop a comment!