


How to transfer iTunes from PC to Mac
You want to switch from PC to Mac and you want to take your iTunes library with you? There are several ways to move iTunes from your Windows PC to your new Mac. You can manually move all your iTunes contents to an external hard drive and from it to your Mac, or you can use a software like CopyTrans TuneSwift that does the job for you. Let's start with the easier way!
Step 1 How to transfer iTunes using CopyTrans TuneSwift
Download and install the software on your PC:
http://www.copytrans.net/copytranstuneswift.php
Note: TuneSwift is Shareware, so you've to get yourself a license to activate the full version. If you've got a complete and well organized library it's worth the money.
As they provide you with an installation wizard and even a step by step guide, it doesn't require any further explanation. The installation will be complete within a minute and once you launch the software you'll find a very simple interface with the following three options:
- Transfer
- Backup or
- Restore your iTunes library
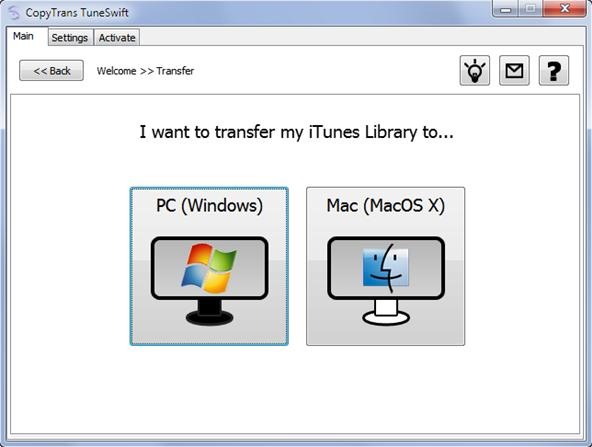
In this case we're going to choose "Transfer". In the next window, called "I want to transfer my iTunes Library to...", click "Mac".
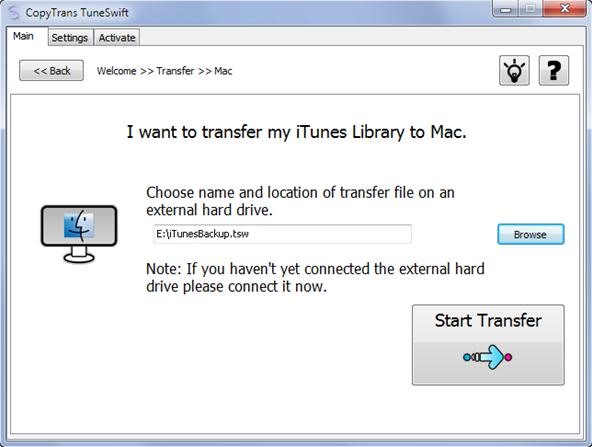
In the third window you can select the external hard drive, where you want your iTunes library transfer file to be stored on. Make sure the external hard disk drive is connected to your PC by now. Choose the name and location of your iTunes transfer file and confirm your choice.
Hit the "Start Transfer" button and lean back. TuneSwift will now start with the transfer of your iTunes library to the external drive. It will create iTunes Library Backup archives. Each archive will have about 4GB, so this way there'll be no formatting issue with FAT32.
A "Transfer in progress..." window will appear, letting you follow every step TuneSwift takes to create the iTunes transfer file. Once the transfer of iTunes to the external drive finished, you'll be notified.
Close TuneSwift, disconnect the external drive and start your Mac.
Restore iTunes on the Mac
Get the Mac application from the following link:
http://www.copytrans.net/support.php?action=showEntry&data=1600
Start TuneSwift, connect your external drive to the Mac and follow the on-screen instructions.
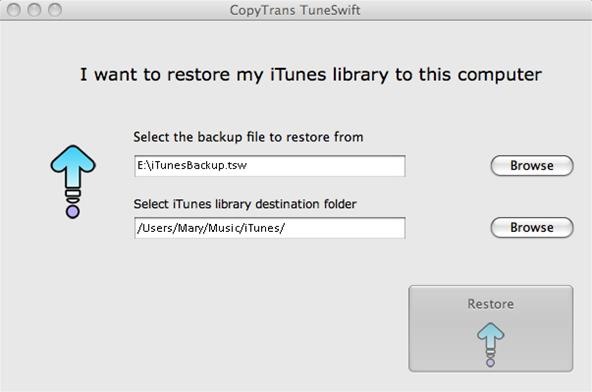
- Select the iTunes backup file from the external drive. Note: If you didn't rename the file it will look like this > "iTunesBackup.tsw"
- Select the iTunes library destination folder on your Mac .
- Start the restore of your iTunes library.
Once again there'll be a window indicating the current operation and you'll be notified once the restore finished.
You're all set - iTunes is back on your Mac!
Step 2 How to transfer an iTunes library from PC to Mac manually
To move the entire iTunes library manually, copy the iTunes folder from your PC to an external drive or an USB flash drive (for very small libraries only). By default the iTunes folder is located under "My Documents" > "My Music".
Note: Make sure that every file of your iTunes library is stored in the iTunes folder. If you've got doubts about it, you should consolidate your library first.
Depending on the size of your iTunes library it may also take some time until everything has been stored on the external drive. Once the transfer finishes, eject the drive from the Windows PC and connect it to your Mac.
Copy the iTunes folder from the drive and replace the existing one (only if it's empty!) from your Mac. Open iTunes and immediately hold down the Option key. Click on "Choose Library" and select the "iTunesLibrary.itl" file. iTunes will now open as it was on your PC.
It may happen, that iTunes can't find the files (exclamation marks will show up), because they're now stored under a different file path. You can try to fix it in adjusting the iTunes media location in the advanced iTunes settings, or you'll need to import the files once again.
Why use a software application? TuneSwift will adjust the file path automatically and it will even transfer the iOS backups, which won't be transferred if you choose to move iTunes manually from PC to Mac. There's no need to consolidate iTunes, as TuneSwift also transfers the iTunes files, which were stored outside the iTunes folder.
Step 3 Other ways to transfer iTunes files from PC to Mac
iTunes itself allows you to transfer the library using DVDs. Honestly, this doesn't make sense if you've got an iTunes library, which is bigger than let's say 10 GB. You'll need 3 DVDs and about 1 hour to save iTunes and another one to restore it, as the DVDs need to be changed every 20 minutes or so.
Another possibility is the use of iPhone to Mac transfer software. This kind of software is useful if you want to merge iTunes music libraries, but none of them can transfer every kind of media like apps or books and you've to complete the transfer once again manually.
As you see, there are a few different ways to transfer iTunes libraries and I hope that there's at least one solution in here that fits your needs.
Just updated your iPhone? You'll find new emoji, enhanced security, podcast transcripts, Apple Cash virtual numbers, and other useful features. There are even new additions hidden within Safari. Find out what's new and changed on your iPhone with the iOS 17.4 update.


Be the First to Comment
Share Your Thoughts